Things you can do with our Zoom integration:
Using Dryfta + Zoom integration, event organizers can do the following:
- Create meetings & webinars from within your Dryfta platform
- Associate webinars and meetings with sessions and breakouts
- Enable meeting and webinar recordings while creating sessions
- Save participants’ check-in & check-out time & export into spreadsheet
Installation:
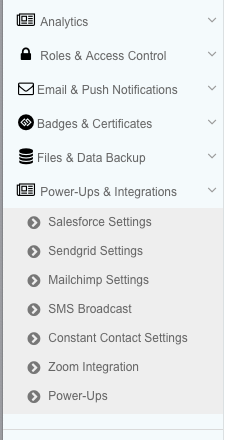
Go to Power Ups & Integrations > Zoom Settings under your Dryfta platform.
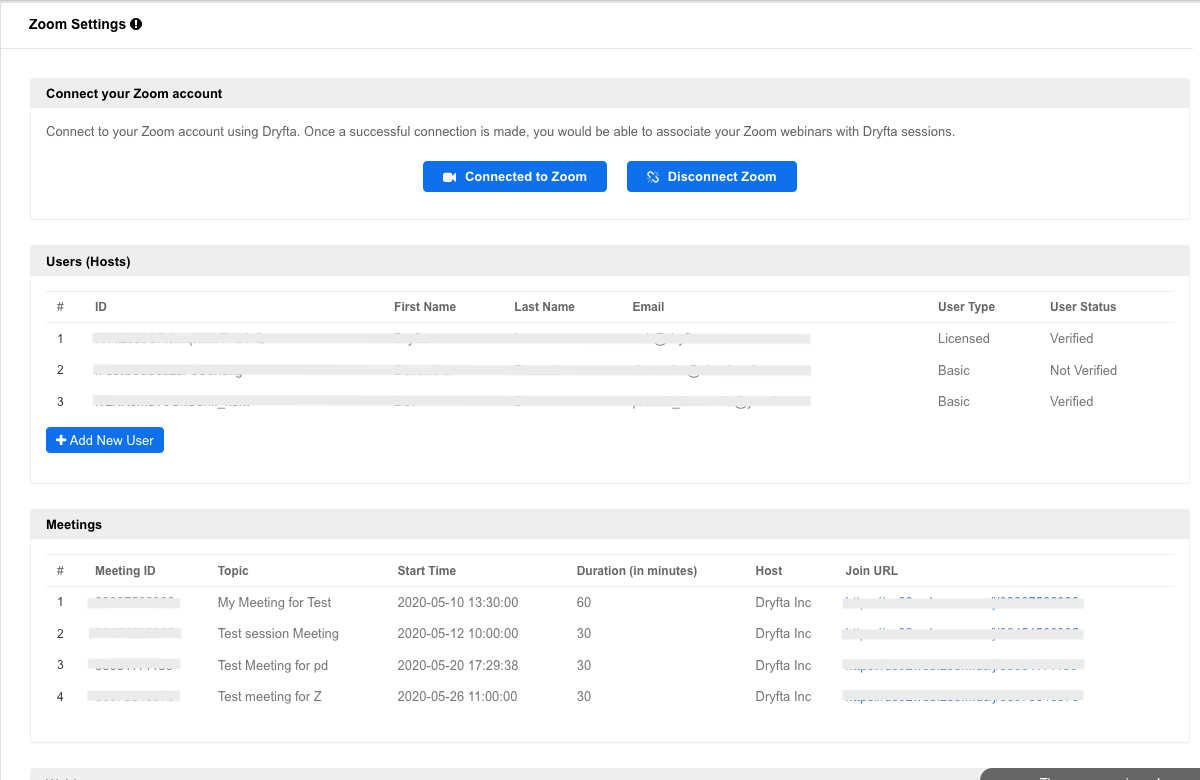
Click on “Connect your Zoom account” button to connect your Zoom Account.
On the next page, click on Authorize to authorize your Zoom account to connect with your Dryfta platform. Once connected, you should see your meetings, webinars and alternative hosts you have already created.
Usage:
Adding alternative hosts
Each session requires at least one host to be able to start and end the webinar. If you’re hosting parallel sessions (when two sessions happen at the same time), you need to have a Zoom account with multiple hosts. There’re can be as many co-hosts but to start/end the webinar, one needs to have a host.
However, if you have no parallel sessions during the event, you do not require multiple hosts in your Zoom account.
We’re using the permission “View users information and manage users” to create alternative hosts from within your Dryfta platform. Once hosts are created, you would be able to assign them to their respective sessions.
Adding an existing webinar to a session
Your existing webinars and meetings you have created in your Zoom account are listed under Zoom Settings in your Dryfta platform.
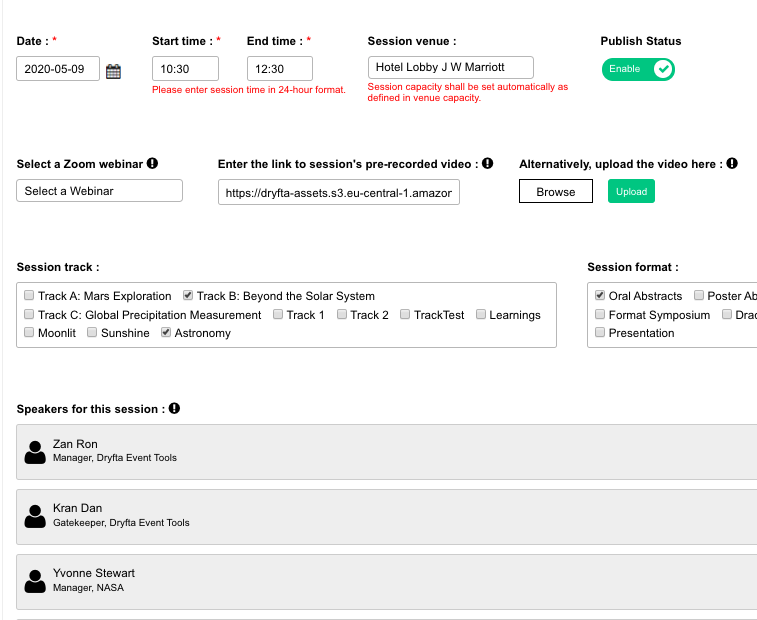
Go to Program Schedule > Program Builder to Edit a session and add an existing webinar/meeting to it. In session editor, select a webinar or a meeting to associate with this session. Once selected, click Save on the top right corner.
We’re using the permissions ” View all user Webinars”, ” View all user Meetings” and ” View all user information” to list webinars and meetings in your Dryfta platform, to authorize registrants for the webinar associated with the session and to add checked-in attendees to the list of registrants in your Zoom account.
Creating a new webinar + Automated recording
If you have existing webinar to associate with a session, you can create a new webinar or a meeting right from within the session editor. Under “Select a webinar” dropdown, choose “Create a new webinar” from the options.
On selecting this option, system would also ask you whether you would like to enable recording for this webinar. Enable it to yes if you would like the recording to be started as soon as the webinar begins.
The webinar is created once you click on the Save button. Dryfta would create the webinar based on the following information:
- Session’s date
- Session start time/end time
- System’s time zone
- Recording status: Enabled/Disabled
- Alternative hosts
We’re using the permission ” View & manage all user Webinars” and ” View & manage all user Meetings” to create new webinars and meetings.
Adding sessions to personal agenda
Attendees can add sessions to their personal agenda and can access them from their dashboard on the website and the apps.
An email reminder is sent 7 days, 3 days, 1 day and 1 hour before the session begins. The email includes the name of the session, date and time along with a Check-in button. Clicking on the Check-in button would take the participant to the session’s page.
Joining a session as an attendee
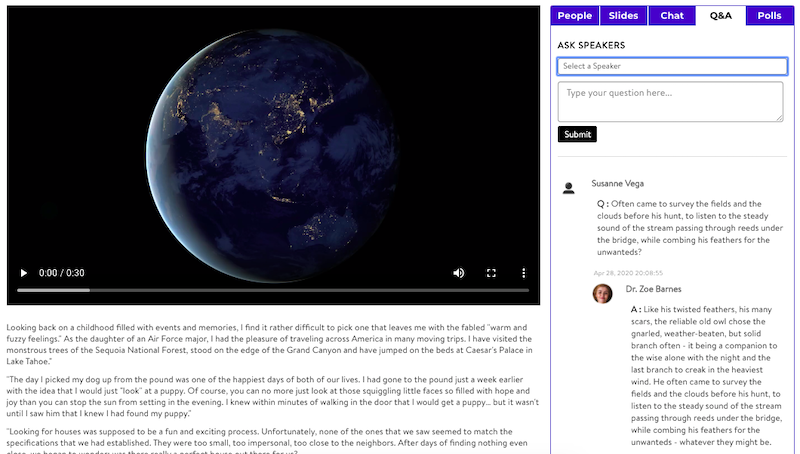
If the user is authorized to join the session, they would see the Check-in button 5 minutes before the session begins. Participant would then click on the Check-in button to join the webinar and check-in time would be recorded.
When user leaves the webinar, that would be recorded as the Check out time. After the webinar concludes, participants’ attendance information is automatically displayed in Dryfta.
Uninstallation:
You can disconnect your Zoom account by clicking on the Disconnect button under Zoom Settings in your Dryfta platform.
Alternatively, you can also uninstall the same from Zoom Marketplace > Installed Apps and clicking on the Uninstall button.
Troubleshooting :
1. Please ensure that you’re on a Webinar plan.
2. If you are planning to conduct parallel sessions, you need to have multiple hosts in your plan. Or else, you would not be able to host multiple sessions at the same date & time.
3. Each session requires at least one host. If you’re hosting multiple parallel sessions, you need to have a Zoom account with multiple hosts. There’re can be as many co-hosts but to start/end the meeting, one needs to have a host. However, if you have no parallel sessions during the event, you do not require multiple hosts in your Zoom account.
4. Please note that if you have at least one session associated with a meeting or a webinar, those associations would be removed after you disconnect your Zoom account.
Contact Support :
Unable to find answers to your questions? Contact our support desk by clicking on the Submit Ticket button on the top right corner.
Support Desk Timings: Our Support Desk is available 24/7.
SLA: For tickets marked “urgent”, we reply and try to resolve within 30 minutes. All other tickets are resolved within 4 hours with first response within 30 minutes.
Request a live training session via Zoom (up to 4 sessions of 1 hour each)
Send us a direct message on our Twitter handle
or simply send an email to support@dryfta.com
Phone Support
24/7 phone support (this is a paid add-on: see add-ons)


